Wayfair Design Services
The goal of Wayfair Design Services was to be the best platform for interior designers to take on eDesign projects by empowering designers to enjoy work on their own terms and providing all of the integrated tools they need in one place.
The problem was that our beta experience did not achieve this goal. We didn’t have a standardized project process in place, and so, our designers were using a disparate set of design tools for sourcing items and designing mood boards with no project guidance in between.
If our business was going to scale successfully, we would need to build a natural yet standardized design process that would give designers more time to do the parts of design that they love (sourcing items, designing mood boards) while making the not-so-fun parts (budgeting, Photoshopping deliverables) more efficient.
My role: As the lead product designer for the experience, I defined how a designer would move through and complete a client project. This was approx. a 3-month long project that required building new features as well as leverage existing ones from other teams across Wayfair.
Process
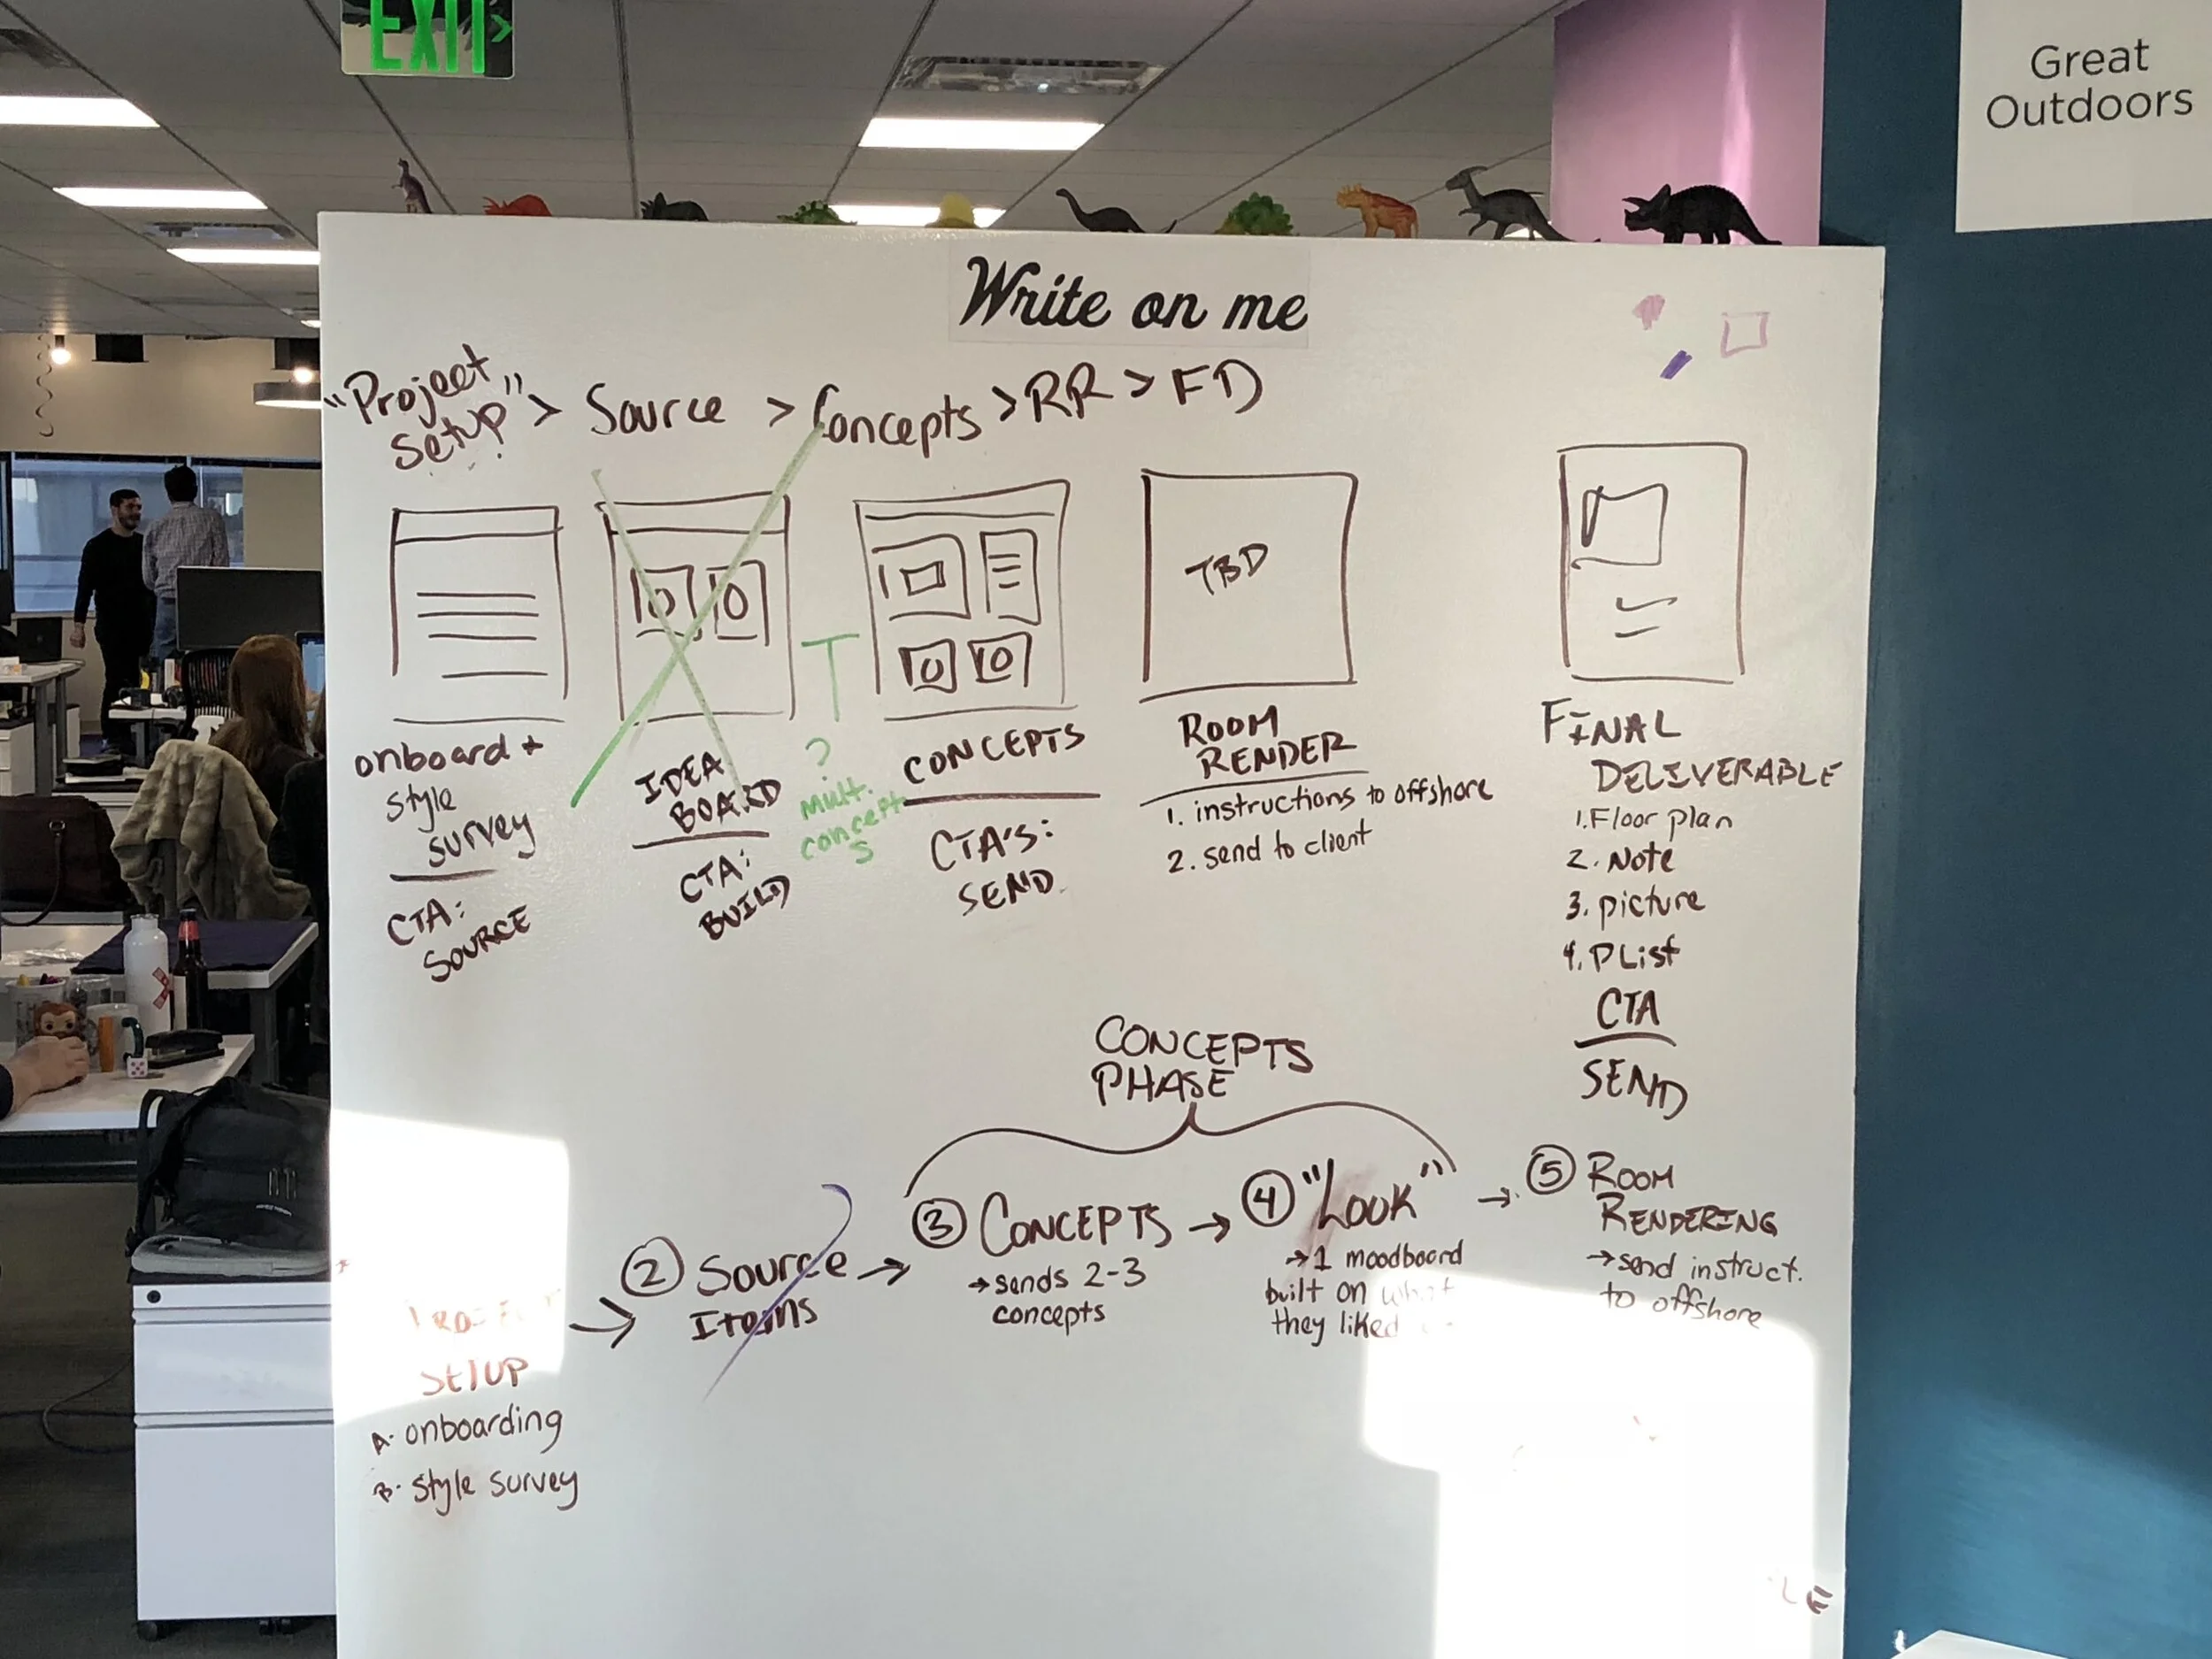
Defining the project phases - I teamed up with another product designer and our in-house interior designers to whiteboard out the designer’s workflow. At the end of the session, we were able to agree upon a user flow.
Defining the offshore flow - The decision to offshore room renderings came only 2 months before our launch date, so we had to quickly figure out how to integrate this into the designer flow with very limited engineering resources.
Keeping track of the details - Since this was a large ongoing project (~3 months), we kept a running Google doc for design, engineering and product to record key decisions and ensure that functionality details didn’t get lost in translation.
Solution
👉 View Full Prototype: Desktop |iOS app |Mobile Web
To orient designers and provide structure to projects, we broke the project lifecycle into 4 phases:
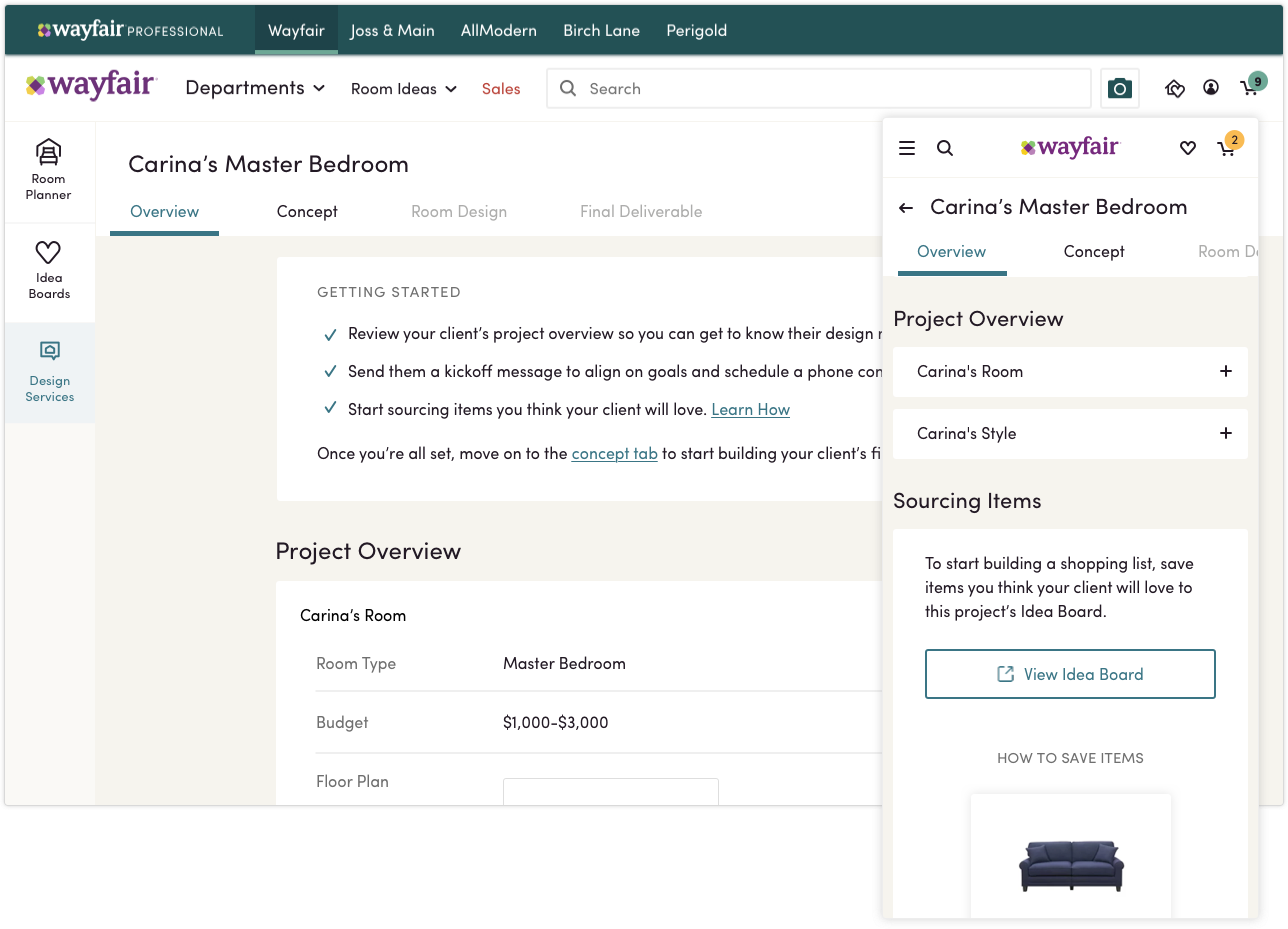
Phase 1: Project Overview
Where the designer familiarizes themselves with client style and design needs / begins to source items for their client.
Phase Two: Concept
Where the designer builds their concepts, keeps track of budget, and prepares deliverables to send off to the client.

Phase 3: Room Design
After the designer has nailed down a concept board that the client is happy with, it’s time to make a realistic rendering of the client’s room. This work is completed by an offshore team, which takes this time-consuming task off of the designer.

Phase 4: Final Deliverable
Once the designer and client are both happy with the room rendering from offshore, the designer can close out the project, which sends the final room rendering, concept, floor plan and shopping list to the client.

Designer Feedback
“You can tell a team of people took so much consideration into making it easy for a designer to do what they do best, which is design. It truly eliminates the stuff most designers find un-fun and cumbersome (math, tracking orders, dealing with orders, data entry, making a price list, creating Excel spreadsheets,etc). LOVE that!”
“I have offered e-design on my website for 6 years, but yours is so seamless, organized, and user-friendly so I prefer to use it now. :)”
“Decorist was the biggest pain in the butt… You make the technology easy… It’s so simple and straightforward”